
 Español
  Deutsch
  Italiano
  中文
中文  日本語
日本語  한국어
한국어  Português
  Русский
  Türkçe
  हिन्दी
  Tagalog
 How to play
The battle rulebook: team formats, every core stat, exact damage math, move roles, type matchups and the four core status effects, so you can understand each turn and make a plan.
1. The goal
Most wild, trainer and standard PvP battles use an adventure team of up to 5 Soltokemons, with one active at a time. Some arena modes use a fixed 3v3 format instead. You win by knocking out every opposing creature required by that mode. Both sides choose each round's action secretly and at the same time, then actions resolve in Speed order.
2. The four stats
- HP (Health): how much damage the creature can take before it faints. The raw number you see.
- Attack: a multiplier on the damage you deal. 1.30 means you hit 30% harder than average; 0.85 means 15% softer.
- Defense: a multiplier that reduces the damage you take. Higher is better. Damage scales with the attacker's Attack divided by your Defense.
- Speed: decides who acts first each round. The faster creature lands its move (and its status) before the slower one. Ties are random.
| Soltokemon | HP | Attack | Defense | Speed |
|---|---|---|---|---|
| Sparkmon Electric | 95 | 1.30 | 0.85 | 140 |
| Pyromon Fire | 105 | 1.25 | 1.00 | 110 |
| Floramon Grass | 115 | 1.00 | 1.05 | 95 |
| Aquamon Water | 130 | 0.85 | 1.30 | 75 |
| Cryomon Ice | 110 | 0.95 | 1.20 | 90 |
| Rockymon Rock | 125 | 1.10 | 1.25 | 65 |
| Galewyrm Wind | 100 | 1.15 | 0.90 | 128 |
| Seraphawn Etherial | 118 | 1.20 | 1.10 | 108 |
| Gravibun Lunar | 124 | 1.25 | 1.05 | 80 |
3. Type matchups
Two type cycles. Within each cycle a type beats the next and loses to the one before it; matchups between the two cycles are neutral.




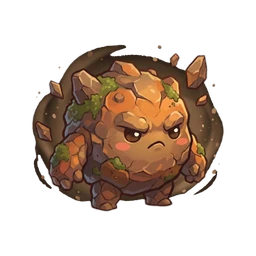



Wind spawns everywhere in the wild like the core types; Etherial is the endgame element, found only in the Lands of Etheria. A type only resists or is super-effective within its own cycle; matchups across the two cycles are neutral.
- Hitting a type you beat (super effective): 1.5x damage.
- Hitting a type that beats you (resisted): 0.66x damage.
- Neutral matchup: 1x damage.
We keep this at 1.5x on purpose. A full 2x would let the type matchup decide the whole game. At 1.5x type is a strong edge, but a bad matchup is something you answer by switching, not a death sentence.
Ice and the second cycle
Cryomon and its evolutions sit outside the four-element core cycle: their matchups against Electric, Water, Grass and Fire are neutral at 1x. Ice belongs to the second cycle, where Rock beats Ice, Ice beats Etherial, Etherial beats Wind, and Wind beats Rock. Against the core four, Cryomon's advantage comes from balanced stats and Frost Bite, which chills the target and lowers Attack and Speed, not from a free type multiplier.
4. How damage is calculated
Every hit runs through this formula:
- Power: the move's base power (see the moves table below).
- STAB (Same-Type Attack Bonus): damage is multiplied by 1.25 when a move's type matches its user, or by 1.0 when it does not. The move's slot does not matter.
- Type: 1.5x super effective, 0.66x resisted, or 1x neutral (section 3).
- Attack ÷ Defense: your Attack multiplier divided by the target's Defense multiplier.
- Random: a small roll between 0.90 and 1.00, so damage is never fully fixed.
- Critical hit: a flat 6.25% chance (1 in 16) on any damaging move to deal an extra 1.5x.
- Damage is always at least 1. Status moves deal no direct damage.
5. Energy ⚡
Energy is the heart of the game. You start each creature at 5 energy and gain +2 at the end of every turn, up to a maximum of 9. Every move has an energy cost, and that +2 regen is lower than a Strike (3), so you cannot just spam your best attack. Each turn the real decision is: spend now, or bank energy for a Burst?
Energy is tracked per creature. Switching does not let you dump a charged Burst onto a fresh fighter, the new one has its own energy bar.
6. The four moves
Each Soltokemon equips exactly four moves. Loadouts are customizable: level-up offers and Technique Discs can replace any slot, including Tackle.
| Move | Cost | Power | Acc. |
|---|---|---|---|
| Low-cost move Low-cost move | ⚡1-2 | 12-18 | 95-100% |
| Reliable move Reliable move | ⚡3-4 | 24-32 | 95-100% |
| Power move Power move | ⚡4-6 | 32-48 | 82-95% |
| Status move Status move | ⚡2-3 | 0 (status) | 95-100% |
Core move examples by type
| Type | Strike | Burst | Signature |
|---|---|---|---|
| Electric | Thunderbolt | Volt Cyclone | Static Shock |
| Fire | Flame Strike | Inferno | Scorch |
| Grass | Petal Storm | Solar Beam | Leech Seed |
| Water | Water Gun | Hydro Blast | Soak |
| Ice | Ice Spike | Glacier Crash | Frost Bite |
| Rock | Stone Hammer | Earthquake | Stone Bind |
| Wind | Gust Slash | Hurricane | Gale Force |
| Etherial | Astral Beam | Ether Nova | Ether Veil |
| Lunar | Moonstone Smash | Moonfall | Lunar Pulse |
Lunar and the forming cosmic cycle
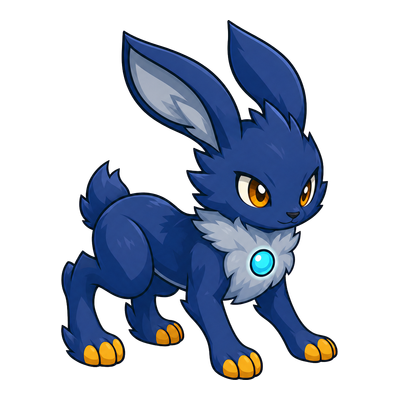
Lunar creatures are found only in the Moon's Reserve. Lunar currently deals and takes neutral 1.0x type damage against every element, so choose it for raw stats, its Shock-based lunar status and its move loadout rather than a type advantage.
Move customization
Build your four-move loadout
Every Soltokemon now fights with four moves. Training and Technique Discs let you reshape that loadout instead of keeping the same attacks forever.
- At every 10-level milestone, a Soltokemon is offered a random new move of its own element. You can decline it or replace one of the four moves it already knows.
- A Technique Disc contains one specific named move. Its name tells you exactly what it teaches before you use it.
- Only a Soltokemon of the disc's exact element can use it. Using the disc consumes it and requires you to replace one existing move.
- If none of your moves is affordable during battle, you can still pass the turn, switch creature or use an item.
Technique Discs in boss chests
Each Warden chest has an independent 20% chance to add a Technique Disc to its normal loot. Solroot favors Grass, Rock and Wind; Abyssal favors Water, Ice and Electric; Umbral favors Lunar, Etherial, Fire and Special moves.
7. Status effects
The four core elements each have a Signature move that inflicts a different status for 3 turns. These are the exact effects documented in this table:
- A creature can carry only one status at a time. Applying a new one (or the same one again) refreshes it back to 3 turns.
- A status sticks to the creature. It only ticks down and deals its damage while that creature is the active fighter.
8. Switching
You can swap your active Soltokemon for one on your bench, but switching uses your whole turn: the opponent gets a free hit on the creature coming in. Switch to gain a type advantage or to save a low fighter, while predicting what they will do. When a creature faints, sending in the next one is free and does not cost your turn.
9. What happens each turn
- You and your opponent pick an action secretly, at the same time.
- Any switches happen first (the switching side does not also attack).
- Remaining attacks resolve in Speed order, faster creature first.
- End of turn: status damage (Burn, Leech) is applied, then both active creatures gain +2 energy.
10. Quick tips
- Lead with a type edge, or with fast Sparkmon to land Shock first.
- Use an affordable move to save energy, or Pass Turn if none of your four moves is available.
- Status first, then attack. A Burned or Soaked foe deals far less damage.
- Do not stay in against the type that beats you. Switch to the one you beat.
- Speed wins races. The faster creature lands its move and its status first.
11. Genetic mutations
Caught Soltokemons can have up to 4 mutation slots that grant permanent bonuses. A Mutagen fills one empty slot, while a Helix Spinner rerolls every existing mutation. Both come from Warden Chests or the player-run $STKM Item Exchange; a Helix Spinner can also be forged from rare materials. Neither is sold for Coins at the Solana City Market. The creature must be Level 15 or higher:
- Mutagen 🧬: fills one EMPTY slot with a random mutation. Useless on a creature with all 4 slots full.
- Helix Spinner 🌀: re-rolls EVERY existing mutation on a creature. Useless on a creature with 0 mutations.
- Three tiers, marked by colour and a letter on the slot pill: white C (common, +5%), blue R (rare, +10%), pink E (epic, +18%).
- Ten kinds: +HP, +ATK, +DEF, +SPD, vs Electric / Water / Grass / Fire, Wild Hunter (vs wilds), Duelist Edge (vs trainers).
- Bonuses are additive across slots. A full set of 4 epics on the same channel caps around +72% - real, but never enough to ignore type matchup or level.
- Mutations belong to the individual creature. Your starter, wild catches and claimed NFTs are separate Soltokemon instances, and an item affects only the creature on which you use it.
Mutations are server-rolled with a secret seed, so you cannot grind for a specific id by timing your clicks. The Mutagen always sticks (it goes into an empty slot); the Helix Spinner is the chase - re-roll a 4-common set hunting for that epic +ATK, but every re-roll costs another spinner.
12. Evolutions
Evolution is level-based and applies only to elemental mascots with an available evolution line. It requires no item or trade. Accepting an evolution changes the mascot's name and appearance, but adds no separate stat jump beyond normal level growth:
- Stage 1 - Level 30. A mid-game milestone (around the city + a couple of trainers). One ✦ star, one glow ring.
- Stage 2 - Level 75. An endgame milestone. Two ✦ stars, a stronger glow.
- Stats already scale with level under the hood (engine.ts), so the evolved sprite is the VISIBLE celebration of growth, not a separate stat jump.
- Evolutions are OPT-IN: when you cross 30 or 75 the game asks. Decline and you stay on the base form even at high level. You can accept later from the Bag (the ✨ button on the card).
- Evolution acceptance is saved per element and follows your account across devices. Each creature must still reach the stage's level threshold itself before it can display that form.
Level and HP belong to each individual creature. Evolution acceptance is saved per element, but a creature only displays an accepted stage after its own level reaches the matching threshold. Alternate wild species do not use the mascot evolution line.
13. Daily Expedition and the Signal
Open the Quest Journal, the book icon in the overworld, for the Daily Expedition. At 00:00 UTC the server deals your account three missions from a rotating pool, always including at least one battle task and excluding activities you have not unlocked. It is separate from story quests.
- The pool contains eight activities: win wild battles, catch a creature, visit an open zone, land fish, play a Degen Arcade round, use the Gear Forge, pray at Solana's statue, or win with the spotlight element.
- Each mission awards 60 to 110 coins. The catch task also gives a Capture Net and the visit task gives a Lure. Claim all three to open the Expedition Chest for 160 coins and an EXP Candy.
- Claim the chest on consecutive days for milestone rewards on days 3, 7, 14 and 30. The day-30 reward repeats every 30 days; missing a day restarts the streak.
- The spotlight rotates through Electric, Water, Grass, Fire, Ice, Rock and Wind. Etherial and Lunar are excluded.
- The free Signal can be started once per UTC day. For 15 minutes, each ordinary unrestricted wild encounter has a 35% chance to use the spotlight element. It never overrides swim-only or restricted-zone pools and does not alter level, rarity or catch odds.
- A Lure increases encounter frequency while the Signal biases the element roll, so they can run together. The Signal never produces Gems, which must be forged, and upgrade materials still depend on the zone.
The Daily Expedition, chest, streak and Signal are all free and server-tracked. Your progress and reset follow your account across devices. A Lure changes how often ordinary wild encounters occur; the Signal changes the element of some of them, and the two effects stack.